
Accurately Measuring Epoxy Proportions
with a Shop-Made Balance
Article and photography by Philip Zhivago
Using this balance, which you can make yourself, you can accurately and conveniently measure the amount of epoxy that you want. No more oversized batches. You can measure out a thimbleful if that’s all you need. No more sweating over the accuracy of the mix when the pump spits out an air bubble and lurches down.
To measure out a batch, put the amount of resin you expect to use into the cup. Place the resin weight on the threaded rod and adjust its position until it counterbalances the resin in the cup. Place the appropriate catalyst weight (for the type of catalyst you are using) on top of the resin weight. Add catalyst to the cup until the balance is horizontal again. That’s it. Stir away.
Note: The photographs in this article show two different balances. The smaller one, with the wood parts made from mahogany, uses 3-ounce disposable cups, available in grocery stores (Figure 1). It has measured the epoxy for dozens of projects, and has been very satisfying to use. The larger balance, shown in most of the fabrication photos, takes an 8-ounce cup and is made from spruce.
Making The Cup Loop
The loop that holds the cup is made from a coat hanger. The heavier the wire, the better. You will need something to bend the loop around, a bit smaller in diameter than the cup, to allow for springback. Bend a length of coat hanger wire around the form, a bit more than a full turn (Figure 2). Adjust the bend slightly to fit the cup, if necessary.
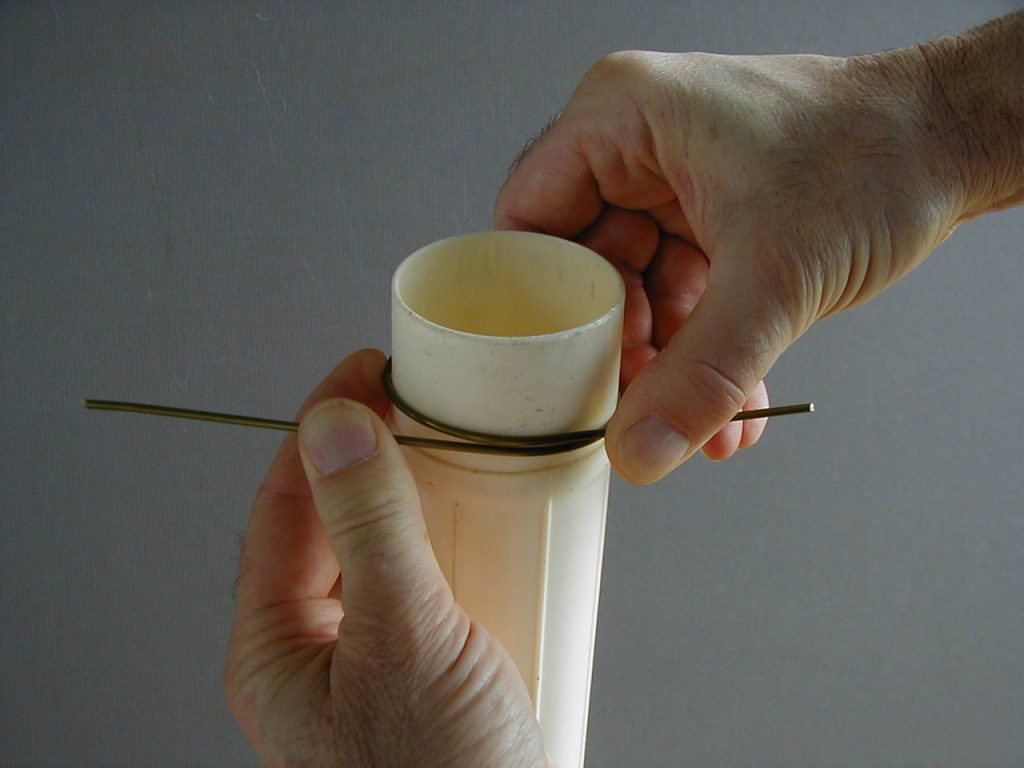
Figure 2
Using pliers, bend one leg out, to run along the threaded rod (Figure 3).
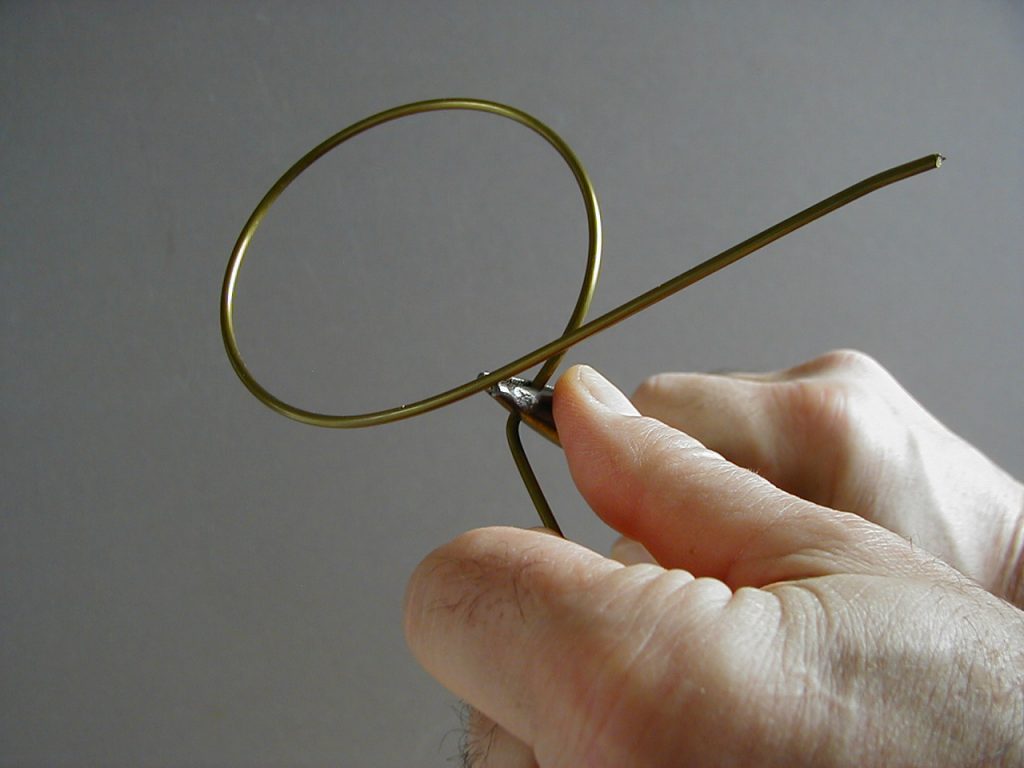
Figure 3
Place the wire around a cup. Grip the wire at the right place to bend the second leg (Figure 4).
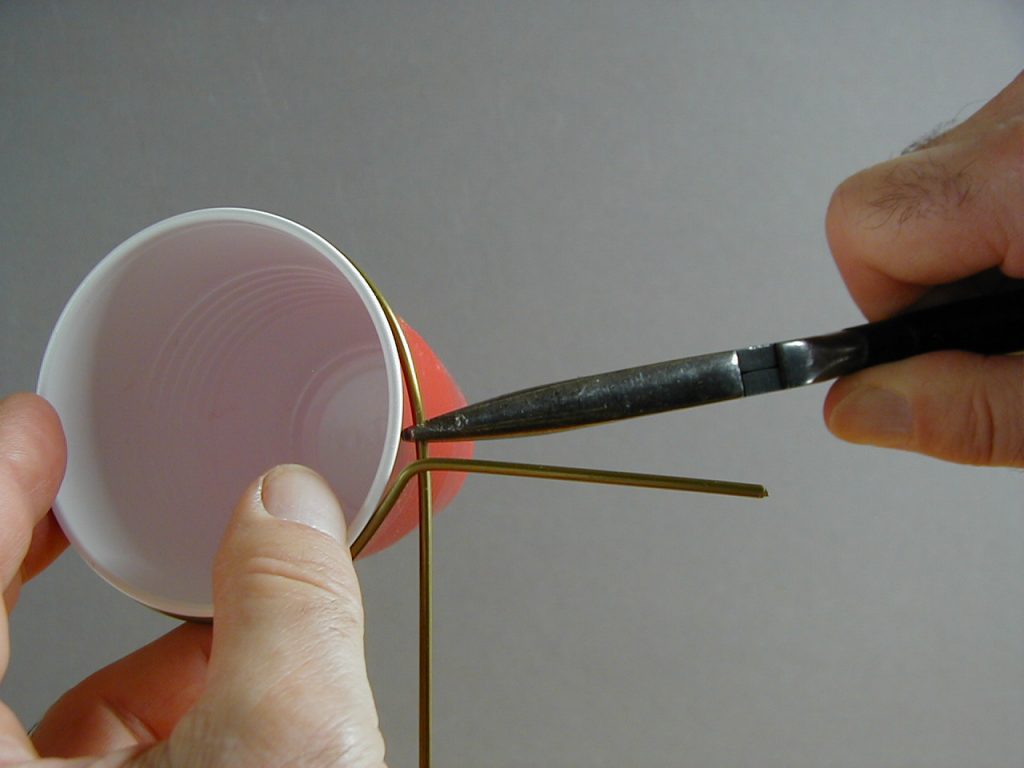
Figure 4
Remove the cup and bend the second leg into place (Figure 5).
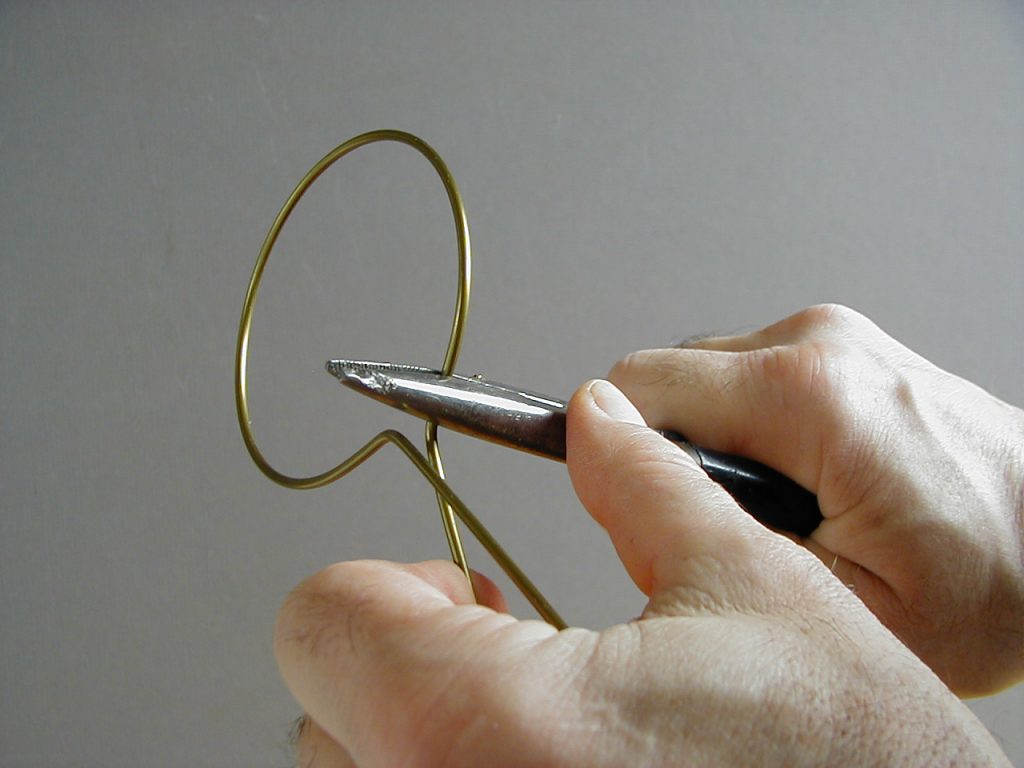
Figure 5
The cup should drop in easily, and seat solidly on its rim. (Figure 6 shows the ends cut to length.)
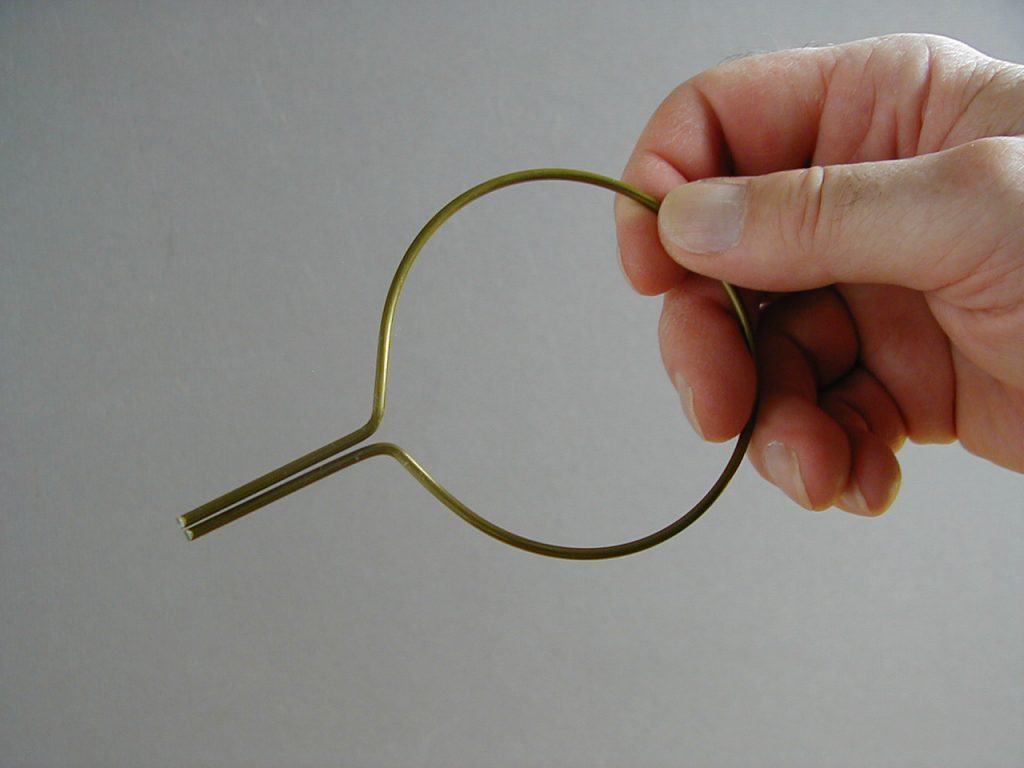
Figure 6
Temporarily attach the loop to a 2-foot length of threaded rod, using nylon wire ties (Figure 7),
some wire, string, or whatever you’ve got.

Figure 7
Test it to make sure the cup fits, then epoxy the legs of the loop to the threaded rod (Figure 8).

Figure 8
A 10-24 rod is strong enough for a 3-ounce cup. A 12-24 or 1/4-28 rod would be better for an 8-ounce cup. A 1/4-20 thread would give up some accuracy due to its coarseness. A 24-TPI rod gives a nice adjustment increment. It is easy to tell when you are in the closest notch to balance, and the precision of the adjustment gives you confidence in the accuracy of the mix. When mixing small batches, this precision makes last-drop accuracy routine.
Making The Pivot
The pivot block (Figure 9) is made from a scrap of three-quarter-inch wood, about an inch and a quarter by an inch and three quarters. The bottom is beveled to form an edge that can rest on your finger for rough balancing.
Holes are drilled for the threaded rod and the bent coat hanger suspension hook. The threaded rod should be as low as practical, and the hook hole just above it.
The hook hole should be just a little bit larger in diameter than the coat hanger wire. The friction this crude pivot provides is helpful in damping the swing, and is easily overcome with a little wiggle for final trim.
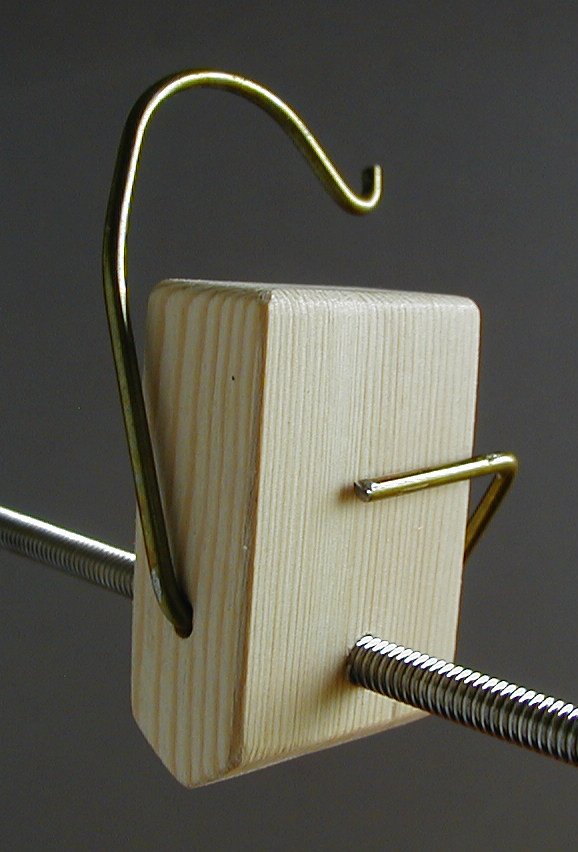
Figure 9
Following the sequence shown in Figures 10, 11, and 12, bend the hook to shape with pliers, to the stage shown in Figure 13. Insert it into the block to test for parallelism. If necessary, tweak the 90-degree bend at the bottom of the hook until the side of the hook lies parallel to the side of the block, not canted in or out. In use, it is easy to see (just by looking down, without having to crane your neck into an uncomfortable position) when the hook is parallel to the faces of the block, which indicates that the rod is horizontal and in balance.
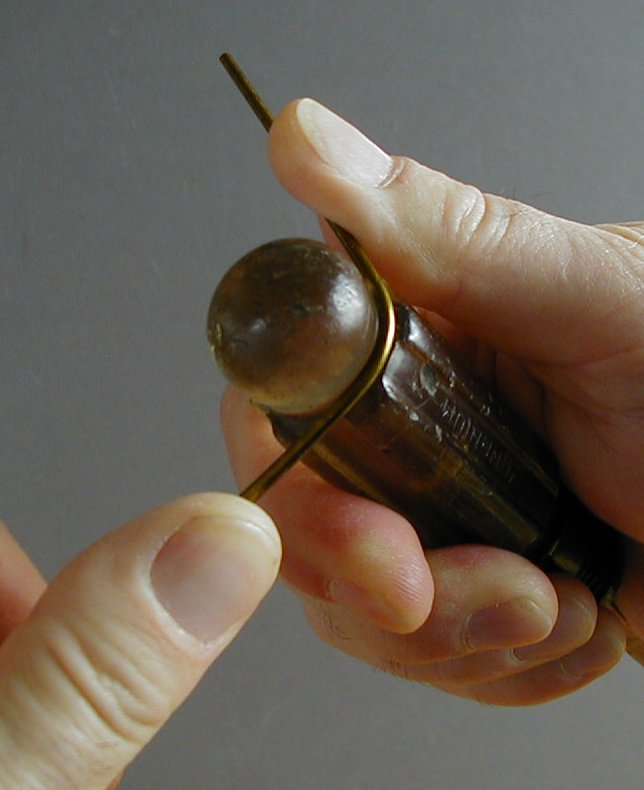
Figure 10
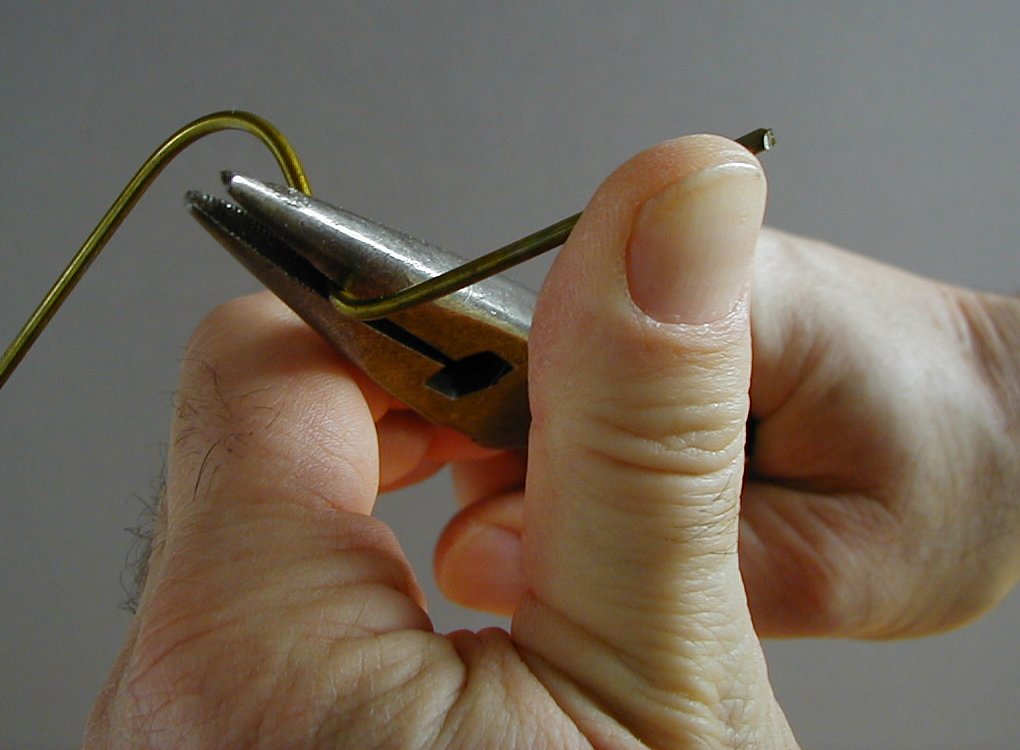
Figure 11
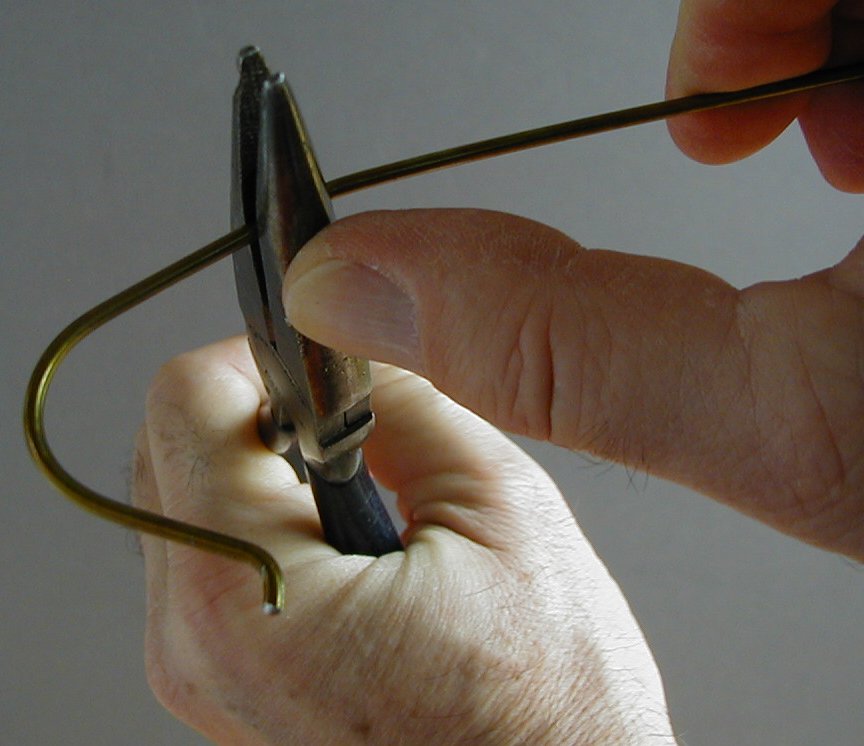
Figure 12
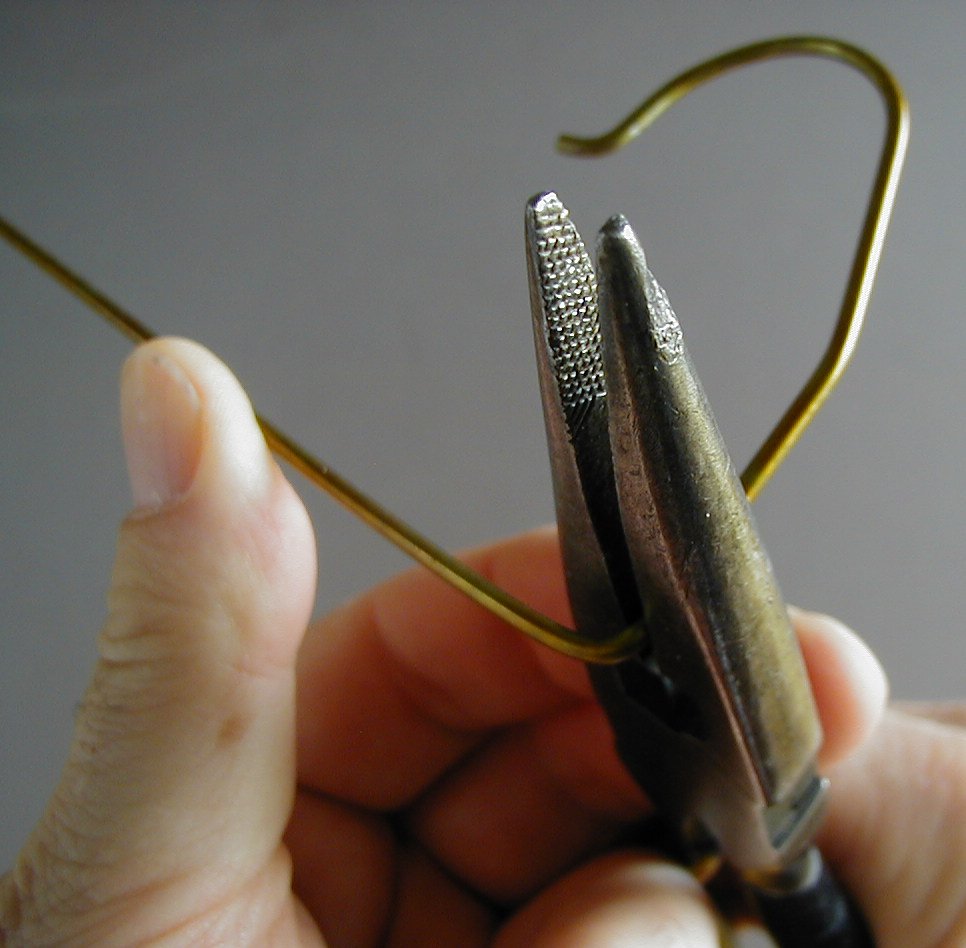
Figure 13
A nut and washer (Figure 14) will lock the pivot block in place on the threaded rod, maintaining the zero adjustment and keeping the cup loop in its horizontal orientation.
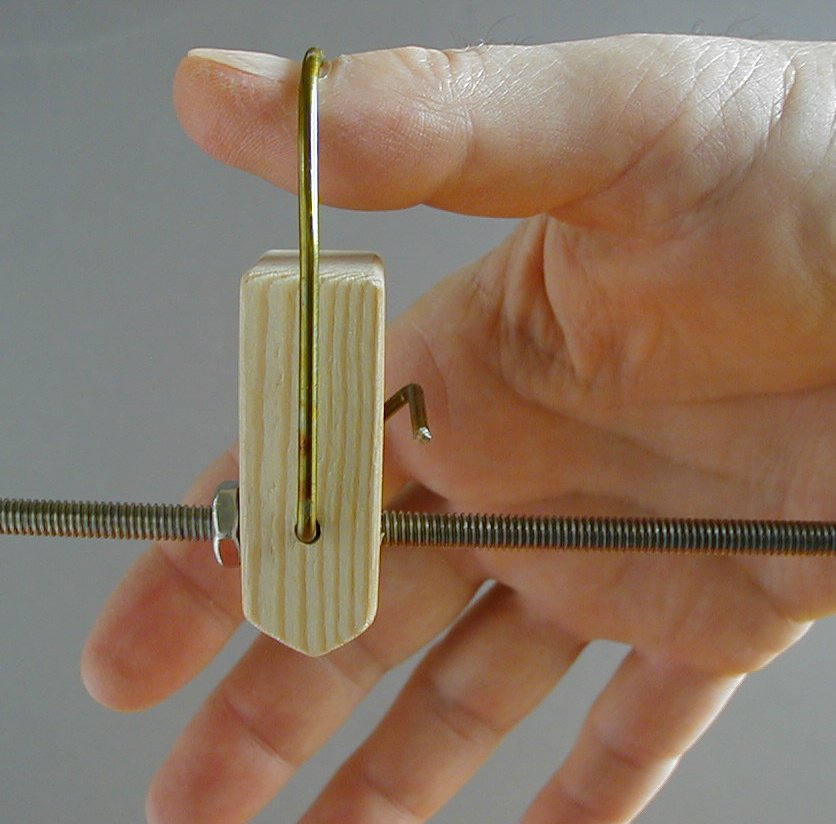
Figure 14
Then bend the tail stop that keeps the hook from falling out and falling over. A thin, temporary spacer (Figure 15) will keep the first tail bend far enough from the previous bend on the other side that the balance will swing freely.
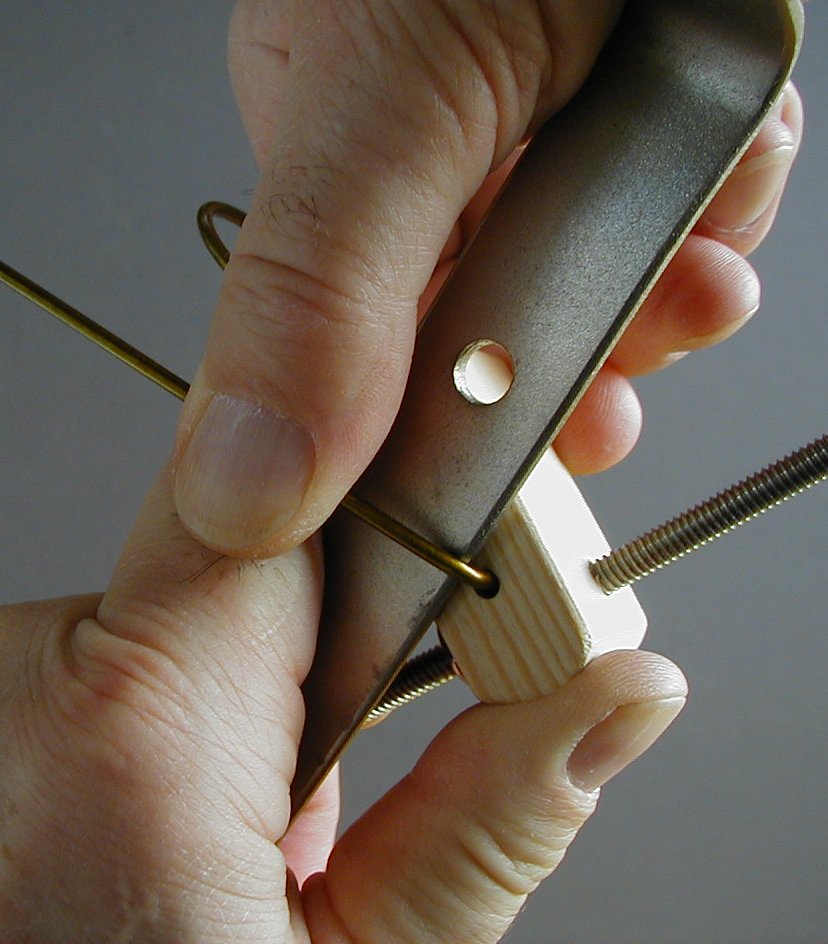
Figure 15
The last bend in the pivot hook (Figure 16) limits the swing of the hook, keeping it in a handy position, and making it easier to control the balance as you are pumping epoxy into the cup.
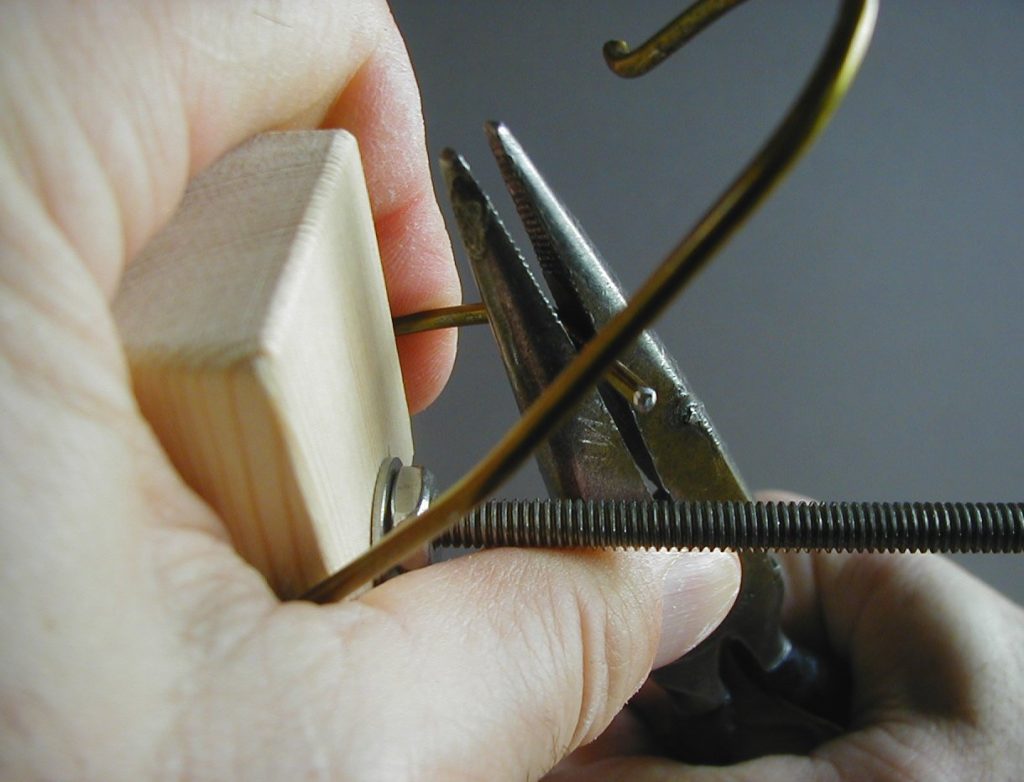
Figure 16
Adjusting the angle between the hook and the tail (Figure 17) will give the hook an equal amount of movement on either side of center.
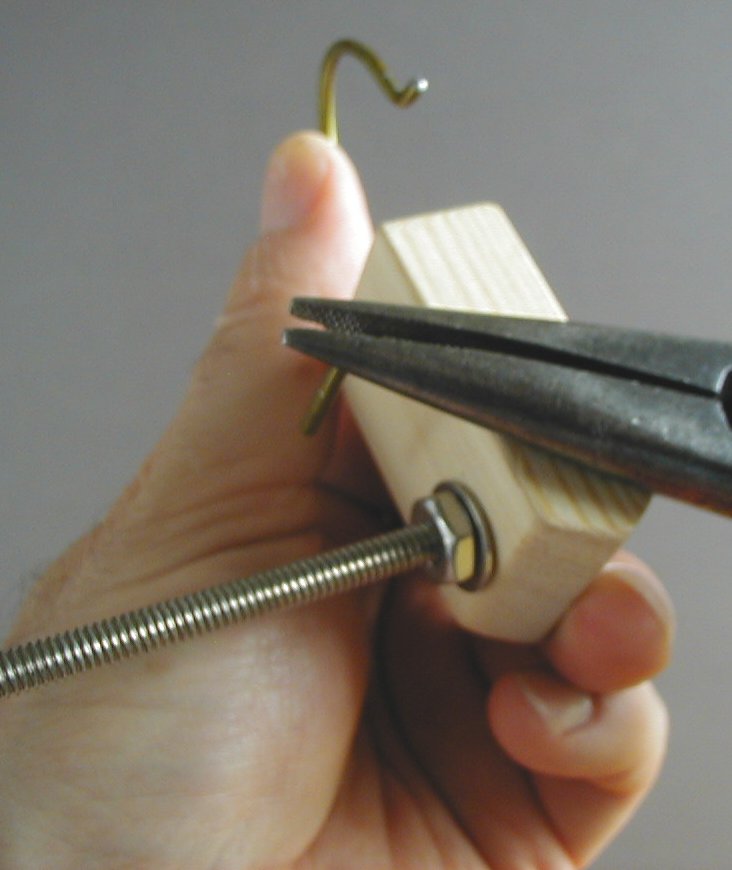
Figure 17
Round off the ends of the coat hanger wire (Figure 18) so that you won’t snag your protective gloves on the sharp ends. Figure 19 shows the finished pivot.
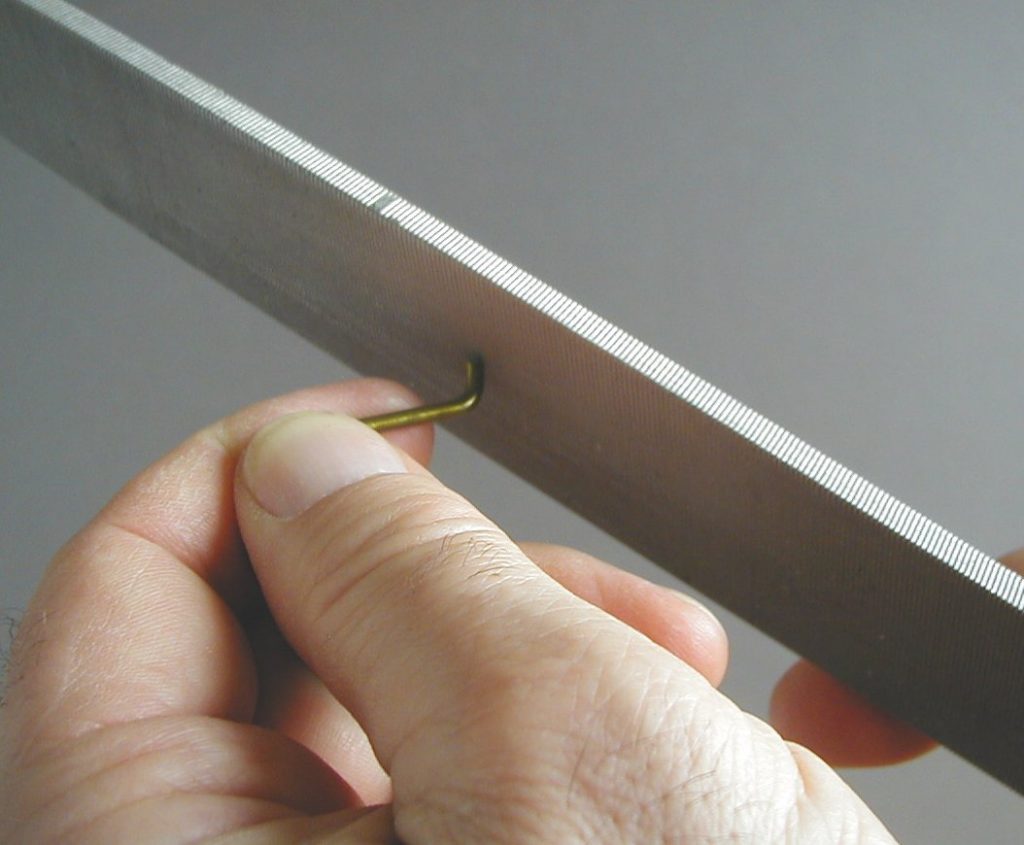
Figure 18
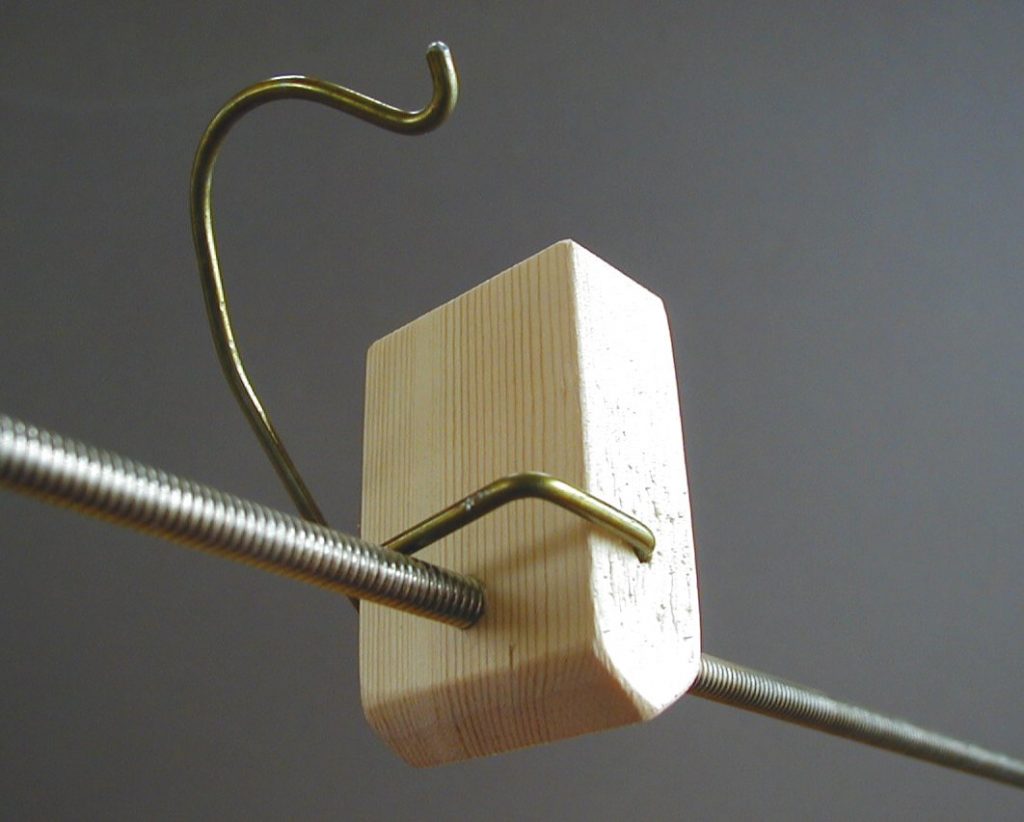
Figure 19
Making The Weights
The two weights together should be almost as heavy as a full cup of epoxy. For an eight-ounce cup, it worked out well to use 2×3 spruce, 5 inches long for the resin weight, 1 inch long for the 5-to-1 catalyst weight, and 1.43 inches long for the 3.5-to-1 catalyst weight. The slot should be about three-quarters of the length of the resin weight (see Figure 1 and Figure 26), so that the center of gravity of the two weights combined is below the rod, keeping the weights upright.
The ears above the slot retain the catalyst weight in the correct position–at the same distance from the pivot as the resin weight–and are easily fabricated. I cut these from a paint stirring stick. Epoxy them into position, using a rubber band as a clamp (Figure 21).
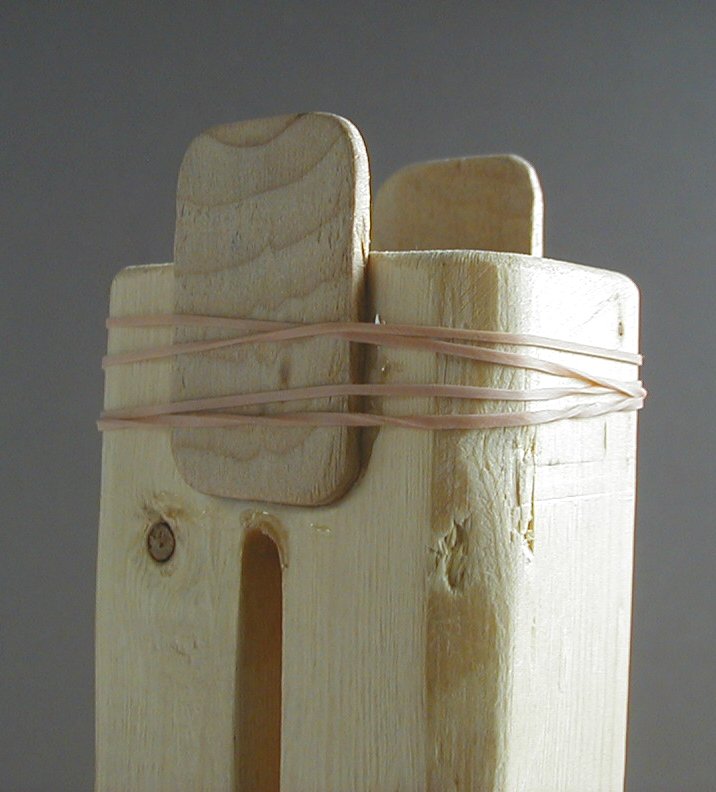
Figure 21
Remove any squeeze-out from the top of the weight. After the epoxy is cured, a couple of light swipes with a file will give the catalyst weight enough clearance to drop into place (Figure 22).
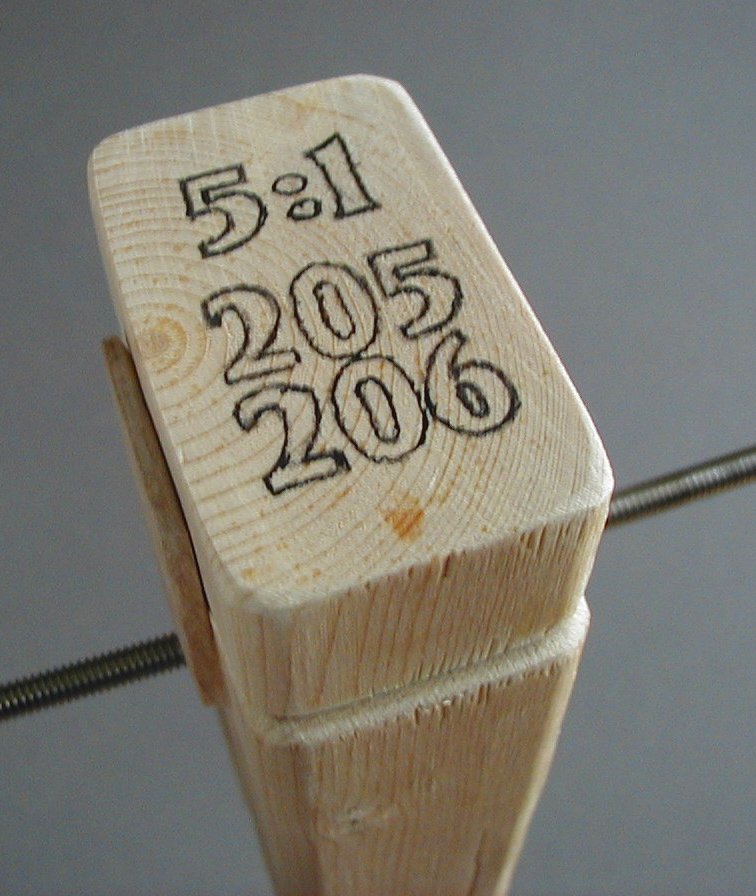
Figure 22
There needs to be a thread in the crotch of the slot, to engage the threaded rod and prevent the weight from sliding out of position when the balance tips.
There are a number of ways to create this thread, all a little fussy and none of them clearly superior. Here are my two favorites.
You can drill a hole where the end of the slot will be, using an undersized drill bit, then tap the thread using threaded rod in a drill, and lastly cut the slot (Figure 23).
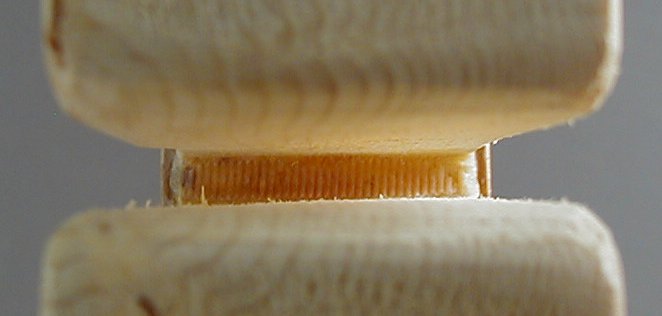
Figure 23
The transition from the saw-cut slot to the thread will need to be cleaned up so that the remaining half of the thread will drop easily onto the rod. This method will work better for hardwood than for softwood.
Or, you can coat a piece of threaded rod with some kind of mold release (I brushed on paste wax with an acid brush), let it dry, put the rod in place, then create the thread using thickened epoxy. Make sure the epoxy contact is limited to the upper half of the rod, extending the radius at the end of the slot, or the rod won’t come out. It is easier to apply the epoxy accurately just outside both ends of the slot (Figure 24), rather than inside it.
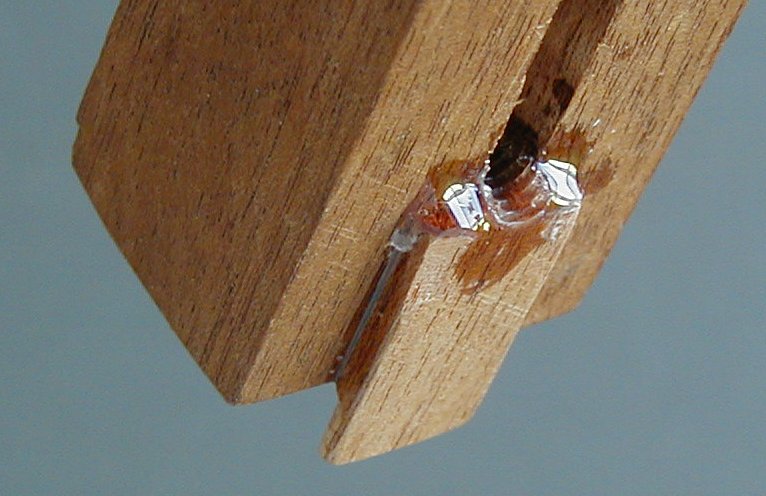
Figure 24
The rod can be held in place with a rubber band (Figure 25) for the epoxying, and a light tap with a hammer will remove it after the epoxy cures.
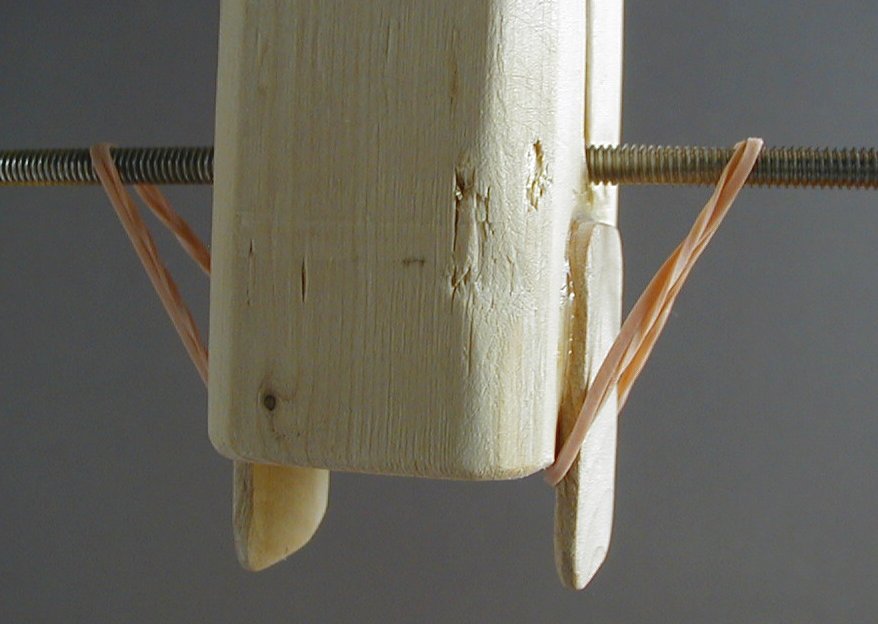
Figure 25
If you decide to experiment with another method of thread fabrication, bear in mind that the thread needs to be simultaneously engaged at both ends of the slot because the weight will shift its load to the uphill end of the slot when the balance tips. If there is only one point of engagement, the weight will disengage and slide down the threaded rod.
Fine-Tuning the Weights
To fine-tune the weights, I used a balance made from a 3-foot-long 10-24 threaded rod and sewing thread (Figure 26). The rod was suspended from a clamp by a piece of thread, at eye level, with a shelf serving as a horizontal reference in the background.
I tied the thread in a figure-eight knot around itself to form a loop that tightened like a noose around the rod and clamp. Then it was easy to adjust the rod into balance by screwing the rod in the right direction through the noose, until the rod was parallel with the horizontal reference.
To suspend the smaller catalyst weights, I hung threads from the rod at 7 and 10 inches from the center, on the opposite side from the resin weight’s thread, providing the correct arm lengths for the weight proportions (Figure 26).
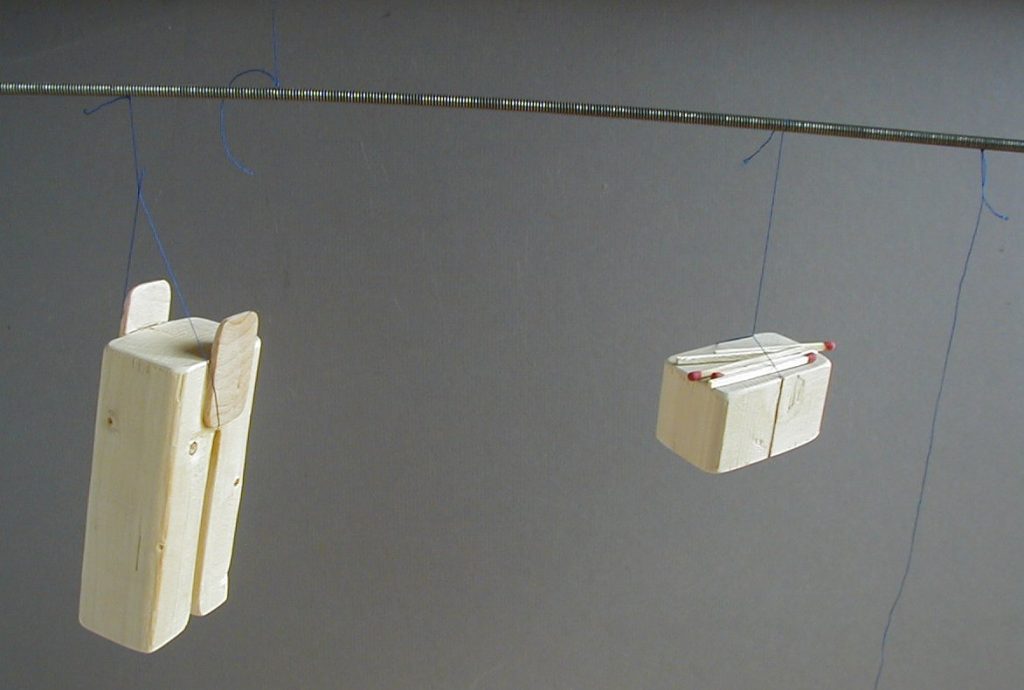
Figure 26
The accurately spaced grooves in the rod made it easy to place the threads at precise distances. I doubled these threads and tied figure-eight knots to make 1-inch loops, then pushed the threads through the loops to form nooses that were easily released (Figure 27). These held the catalyst weights nicely.
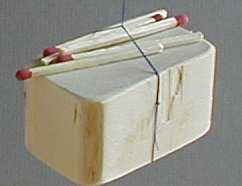
Figure 27
To suspend the large resin weight from the rod, I hung a thread from the rod at 2 inches from the center thread, using a noose. At the bottom, I doubled the thread and tied a figure-eight knot to form an open loop, large enough to hang the weight in it (Figure 28).
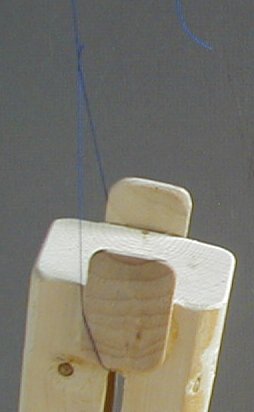
Figure 28
Once all the thread hangers were added, the rod was a little bit out of balance, so I added a piece of string to the light end and adjusted it in and out until the rod balanced again (Figure 29).
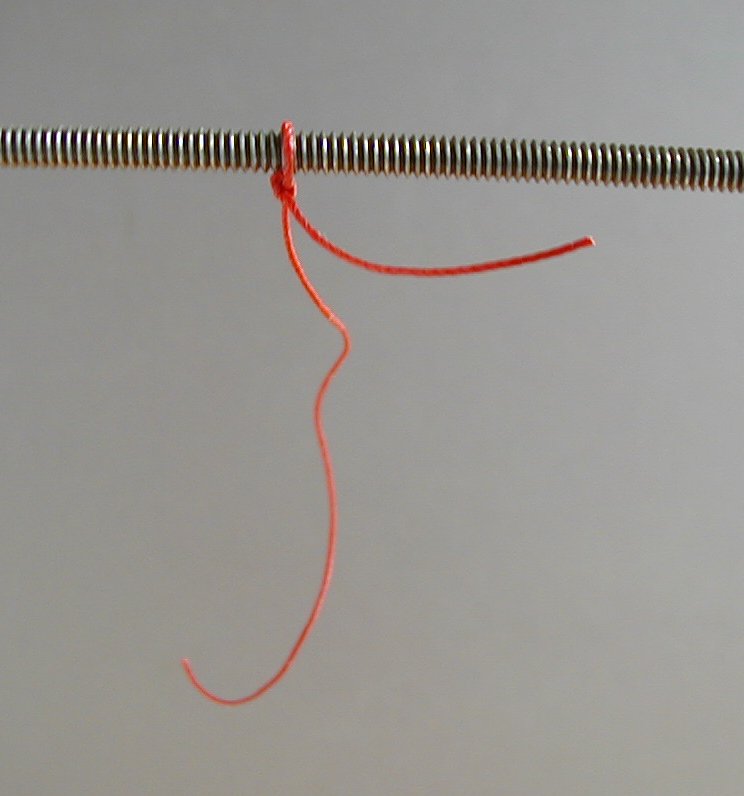
Figure 29
Because I had hung my balance from a clamp on a shelf, it was convenient to hook the light end under the shelf-or the heavy end over the shelf-when a weight was removed for lightening.
Both the resin and catalyst weights in these pictures were cut to proportional lengths from the same 2×3, so they were already close to the correct weight ratios. I added wooden matchsticks (Figure 30) to the underweight weights to bring them into balance and get a sense of how much wood to remove from the overweight weights, allowing for the effect of the different lever arms for the two weights. Three matches at 10 inches is the same as fifteen matches at 2 inches (thirty inch-matches each).
Figure 30
After two very light chopsaw cuts off the bottom and a little sanding, the overweight resin weight balanced the 3.5-to-1 catalyst weight. Then a couple of swipes on the beltsander brought the slightly overweight 5-to-1 catalyst weight into balance with the corrected resin weight.
I checked the weights on a fairly accurate commercial beam balance made for kitchen use, and found one weight was within 3% of exact proportion and the other was within less than 1%. And I can’t say for sure which balance had the error.
Mark the catalyst weights to remind your helper to use the correct proportions for the catalyst in use (Figure 31 and 32).
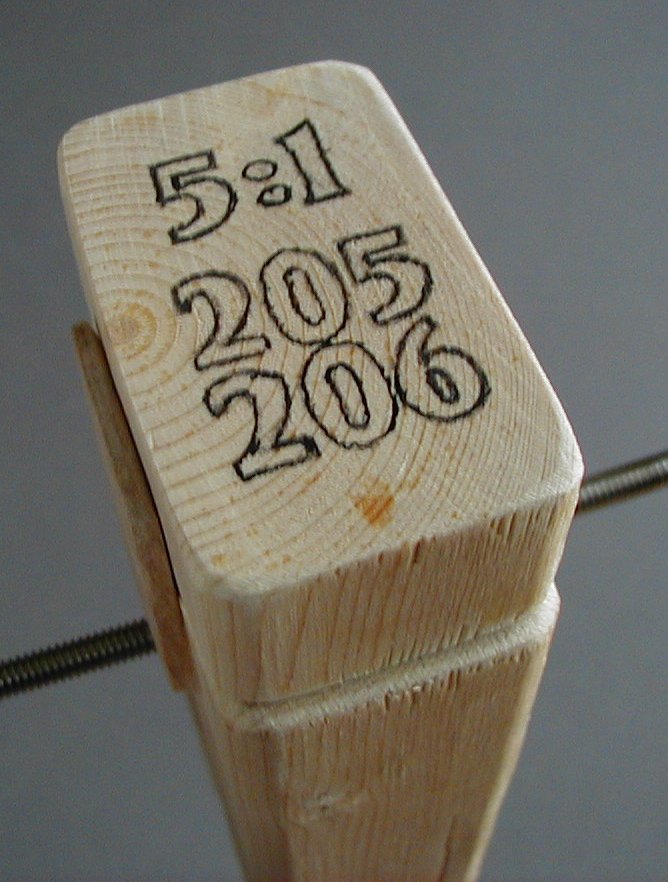
Figure 31
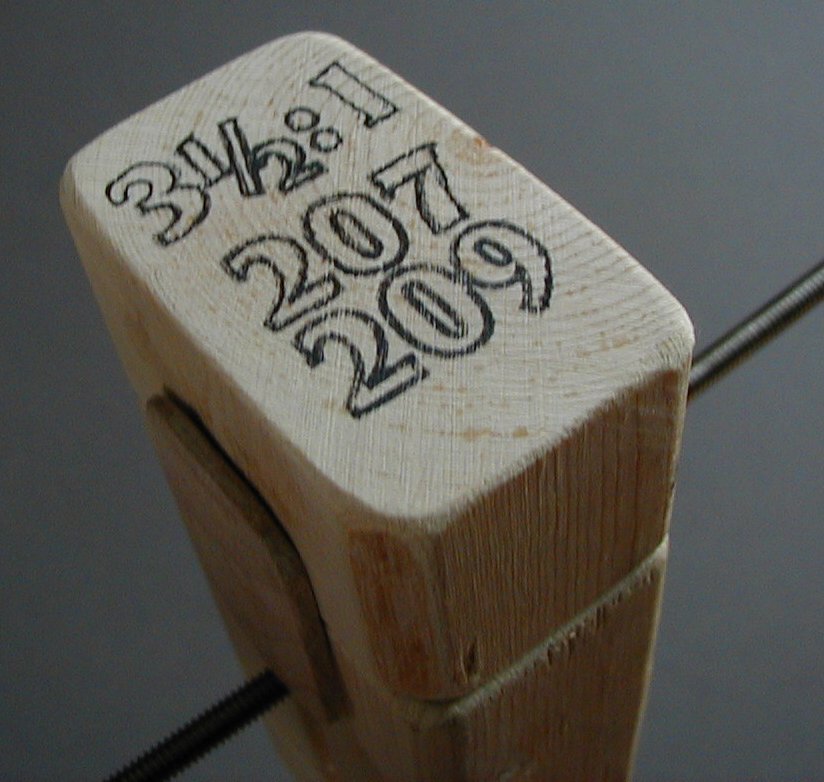
Figure 32
The fancy typography is obvious overkill. A rough marking pen scribble would have been more appropriate.
Using the Balance
To mix a batch, pump the amount of resin you expect to need into the cup. I usually drop the cup into the loop first, but it doesn’t matter.
Position the resin weight to balance the resin in the cup. It helps to support the out-of-balance rod with your last three fingers (Figure 33).
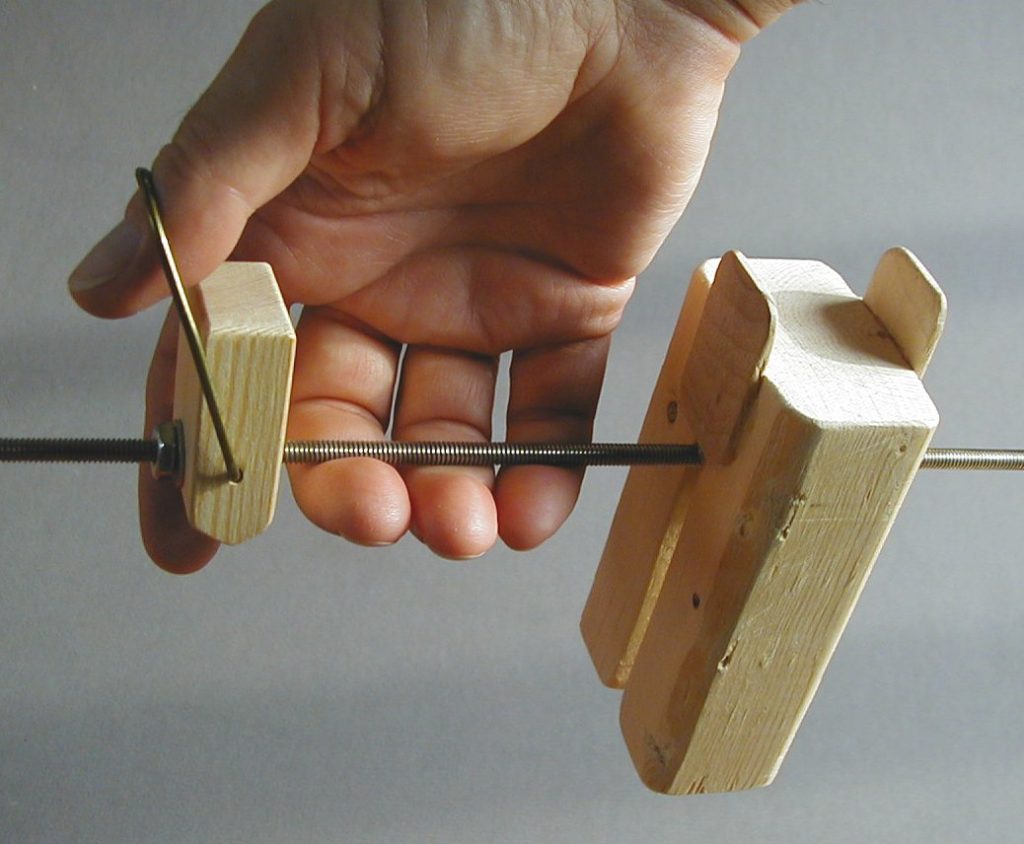
Figure 33
Resting the pivot block on your index finger and putting your thumb on top of the pivot block makes it easier to handle the out-of-balance rod while you position the resin weight (Figure 34).
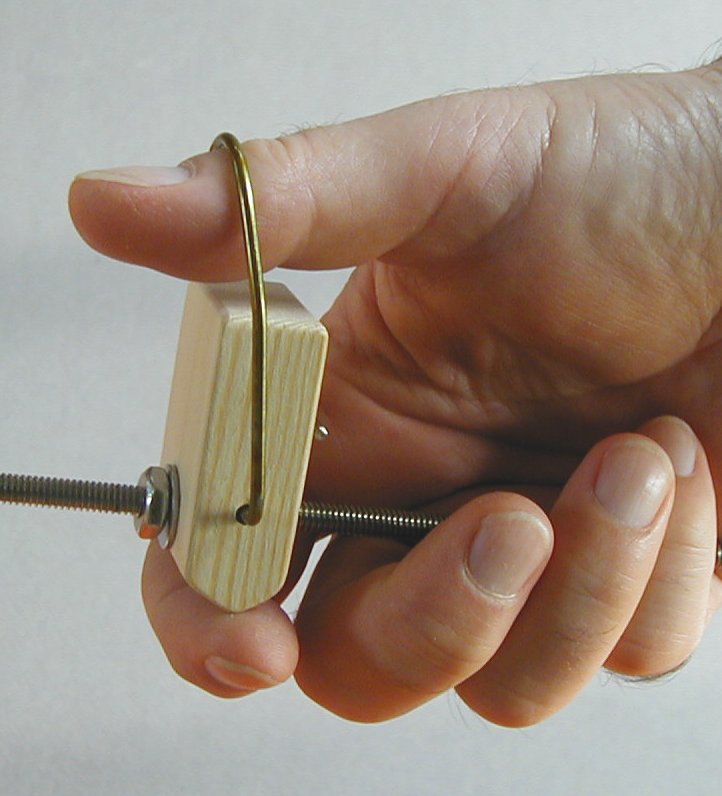
Figure 34
Once the weight is close to the right spot, switch to suspending the balance by the hook (Figure 35 and 36).
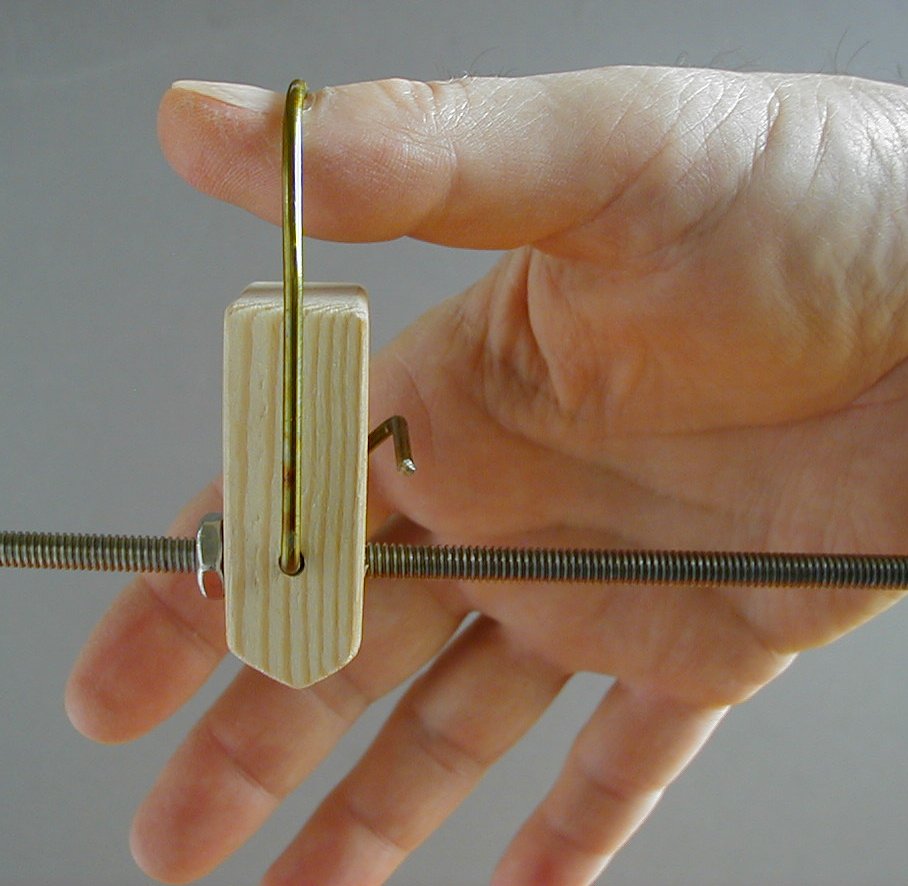
Figure 35
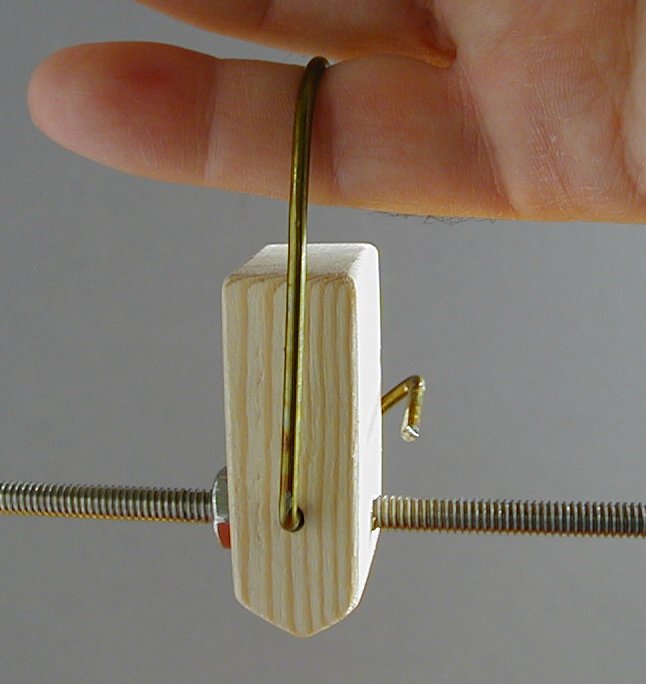
Figure 36
The threads provide a nice increment of adjustment. Give the hook a little wiggle to overcome the pivot friction when you’ve got it close. Positioning the weight in the nearest notch to balance is plenty close.
Grasp the balance by the pivot block again and place the correct catalyst weight on top of the resin weight. Begin pumping in catalyst. You should be able to tell when you are getting close to the right amount by the feel of the balance in your hand, and by eyeball estimate in the cup. Switch to the hook again and add the last little bit of catalyst to bring the balance to zero. The proportions are now correct. Mix and use.
Odds and Ends
An optional coupling nut, as shown here, can serve as an adjustment weight, making it easy to accommodate different weights of epoxy vessels (Figure 37). Just bring the balance to zero with the vessel only, by spinning the nut toward the high end.
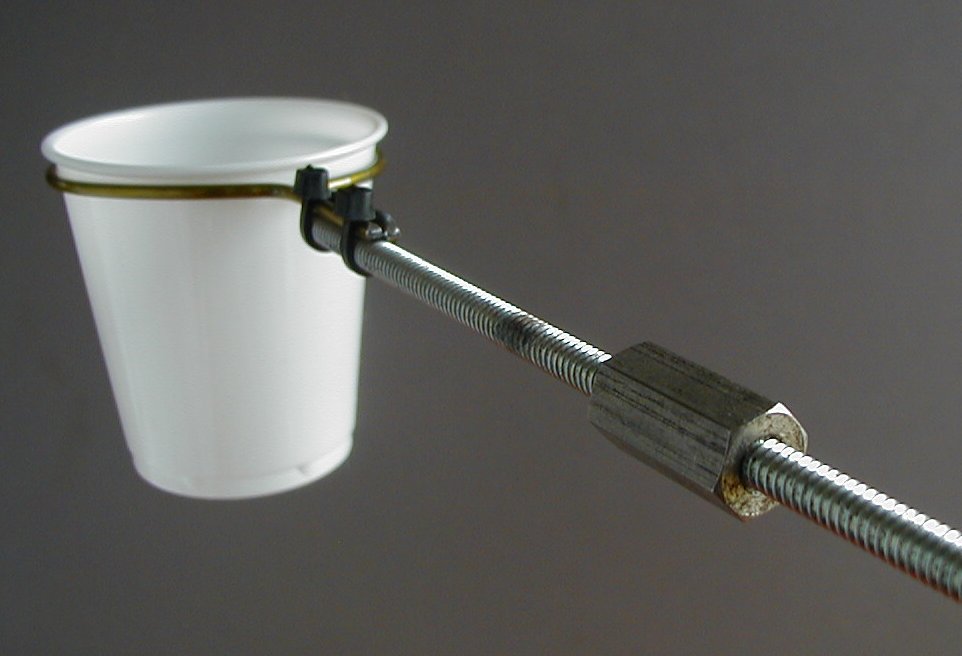
Figure 37
No adjustment is necessary when you are using cups from the same package, so normally there is no need for it.
If you are mixing very small batches, a modified clothespin (in place of the wire loop) can grip a surprising variety of bottle caps and other small vessels (Figures 38, 39, and 40).
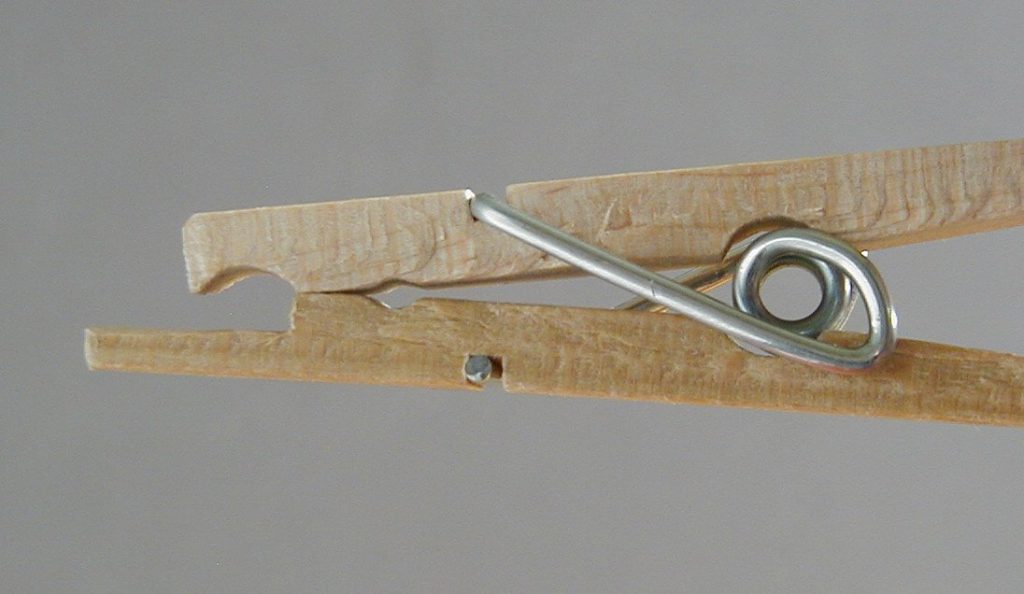
Figure 38
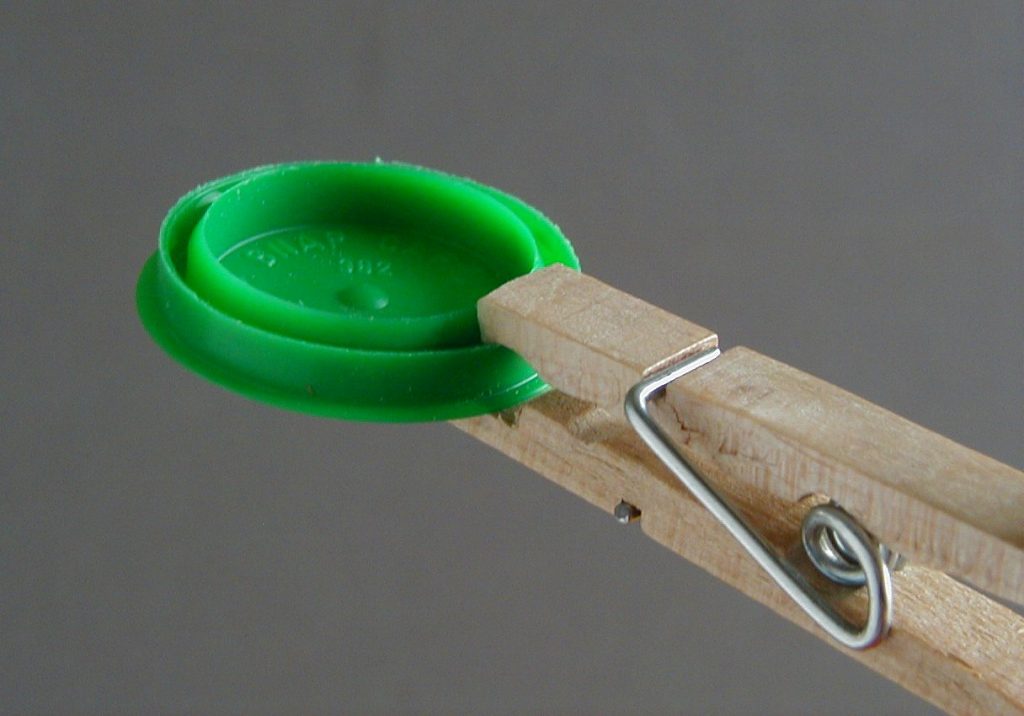
Figure 39
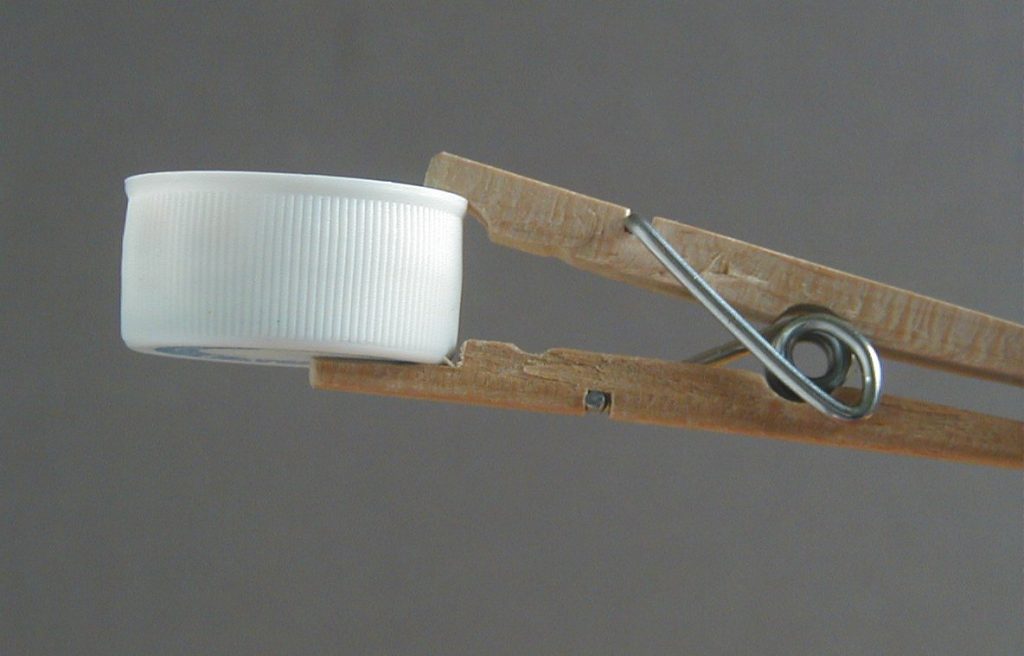
Figure 40
The rest of the balance ought to be scaled down, too. However, the 3-ounce cup version in the photos will measure out a batch as small as 3/16 of an ounce, about a thimbleful.
